
How To Play Avia Masters 2
Avia Masters 2 keeps the flight mechanics that made the original a hit and layers a genuine strategy on top: four Booster symbols that protect your multiplier chain, shoot down rockets and pull you back from a crash. Rockets still threaten to halve your Counter Balance mid-flight — the difference is that now you have something to fight back with. This guide walks through a full round, symbol by symbol.
Practise In The Free Demo
Understand The Controls and Display
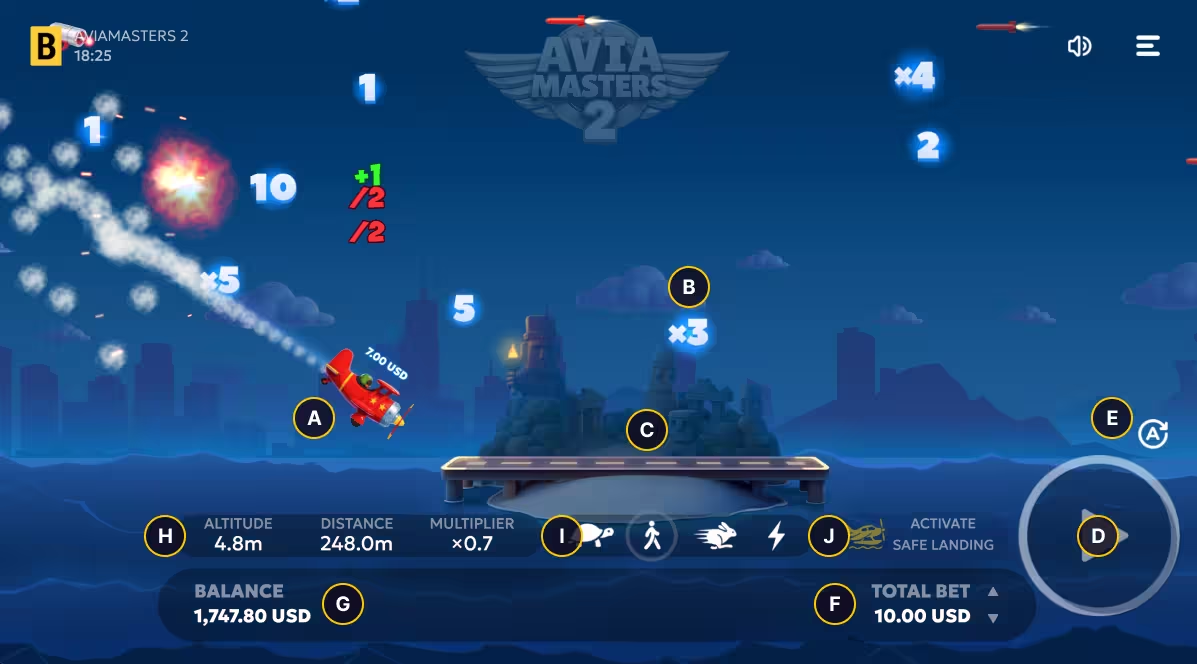
Before the first take-off, it is worth spending a minute on the screen itself. These nine elements are the key components of Avia Masters 2 — between them they cover everything you will look at, tap or react to during a round. Each one is marked with its matching letter on the labelled interface below.
- Plane and Counter Balance
- Floating Symbol
- Landing Pad
- Play Button
- Auto Play
- Bet Size
- Balance
- Flight Statistics
- Speed Control
A Step-By-Step Guide To Every Flight
Every round of Avia Masters 2 follows the same shape. You set a stake, the plane takes off along a randomised path, and a running total called the Counter Balance climbs or collapses depending on what the aircraft hits on the way. The round ends when the plane comes down — on an island you get paid, in the water you do not. Everything below sits between those two moments. Work through it once with the free demo open in another tab and it will make far more sense than reading it cold.
Step 1. Set Your Bet Amount
Bets run from €0.10 up to €250 per round, adjusted with the controls beside the Spin button before you launch. Start low. The flight paths are randomised and the booster spawns are not something you can plan for on your first few rounds, so give yourself enough attempts to see the patterns before you scale the stake.
This is also the point at which you decide whether to buy Safe Landing for the round. It sits behind the “Activate Bonus” control to the right of the progress dashboard, costs ×50 your base bet, and guarantees the plane reaches solid ground. More on exactly what that is and is not worth further down.
Step 2. Launch The Plane
Press Spin and the plane lifts off into the night. The route is generated fresh every time, so no two flights run the same line across the map. If the Spin button is sitting somewhere awkward — particularly on a phone — open Settings and drag it. You can reposition it anywhere on screen, resize it and drop its opacity so it stops covering the action.
Step 3. Read The Counter Balance
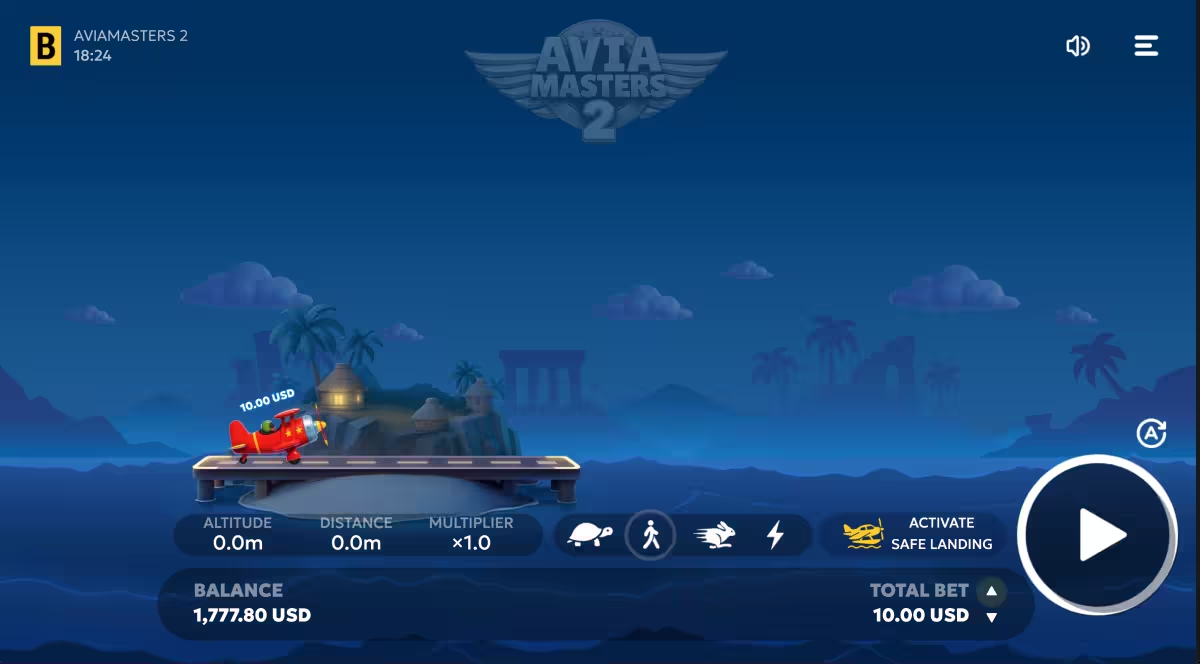
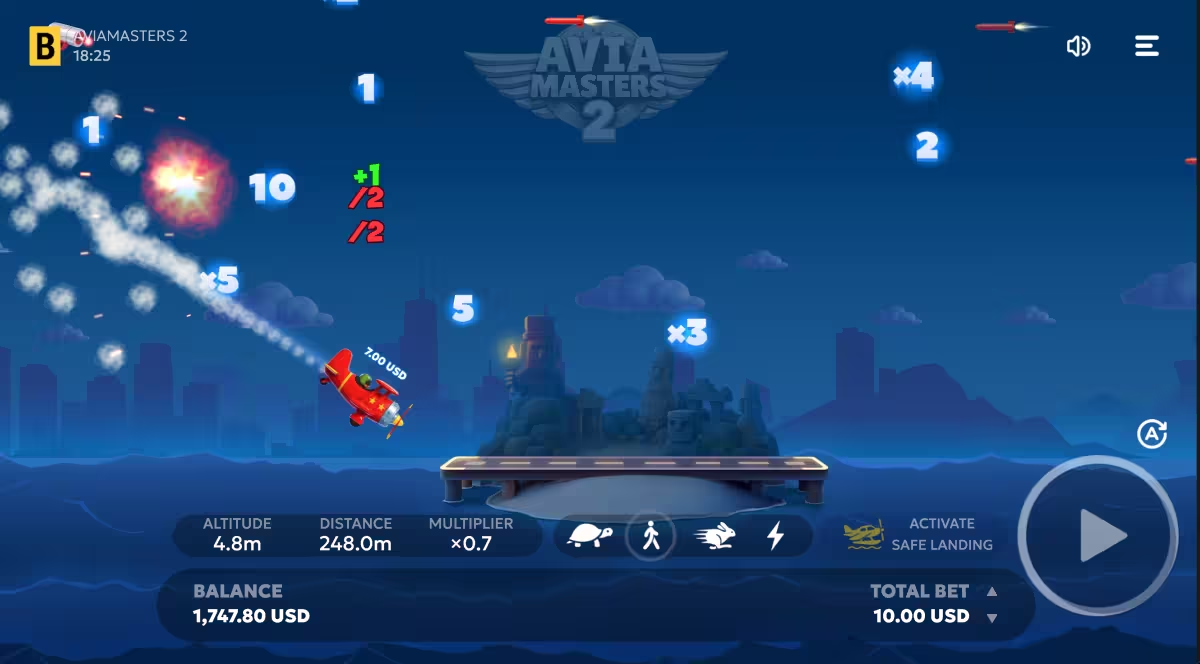
The number floating above the plane is the Counter Balance, and it is the only figure that matters. It updates live with every symbol the aircraft touches, and whatever it reads at the moment of landing is what gets applied to your bet and paid out. Land on ×40 with a €2 stake and you collect €80.
Alongside it, the progress dashboard tracks altitude, distance travelled and your aggregated multiplier. Altitude is worth watching closely: symbols sit at different heights, so a plane that has been climbing has access to a completely different set of pickups than one that has been dragged low by rockets.
Step 4. Collect Multipliers, Avoid Rockets
Three kinds of thing sit on the flight path, and telling them apart at a glance is the first real skill in this game.
| What You'll Meet | What It Does |
|---|---|
| Additive symbols | Add +1, +2, +5 or +10 straight onto the Counter Balance – and push the plane higher |
| Multiplier symbols | Multiply the entire Counter Balance by ×2, ×3, ×4 or ×5 – and gain altitude |
| Rockets | Halve the Counter Balance – and drag the trajectory down toward the water |
| Booster symbols | Magnet, Laser Gun, Nitro or Life Buoy – each rewrites the physics of the round |
| Island or water | Island pays out the Counter Balance – water ends the round with nothing |
The important distinction is between adding and multiplying. Additive symbols are steady and safe; multiplier symbols are where a run turns into something worth talking about. The maths is simple once you see it side by side.
| Symbol | Type | New Counter Balance |
|---|---|---|
| +1 | Additive | ×11 |
| +2 | Additive | ×12 |
| +5 | Additive | ×15 |
| +10 | Additive | ×20 |
| ×2 | Multiplying | ×20 |
| ×5 | Multiplying | ×50 |
| Rocket | Hazard | ×5 |
That last row is why rockets dominate the game. A single hit on a ×50 run wipes out more value than four additive pickups will put back, and it drops your altitude at the same time — costing you the higher-value symbols you were on course to reach. Managing rockets, not chasing multipliers, is what separates a good session from a frustrating one.
Step 5. Use Your Booster Symbols
This is the headline addition in Avia Masters 2. Four collectable Booster symbols spawn at random along the flight path, and picking one up changes how the rest of the round behaves. They are not cosmetic and they are not interchangeable — each solves a different problem.
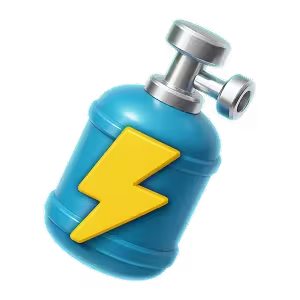
- Nitro
- – Fires the plane forward in a burst and makes it completely immune to rockets for the duration of the dash. The cleanest way through a rocket-heavy stretch of the map without taking a hit to your Counter Balance.
- Life Buoy
- – A second chance. If the plane touches the water while a Life Buoy is held, it bounces back out and the round carries on instead of ending. One use per Life Buoy collected, so a second water contact will still sink you.
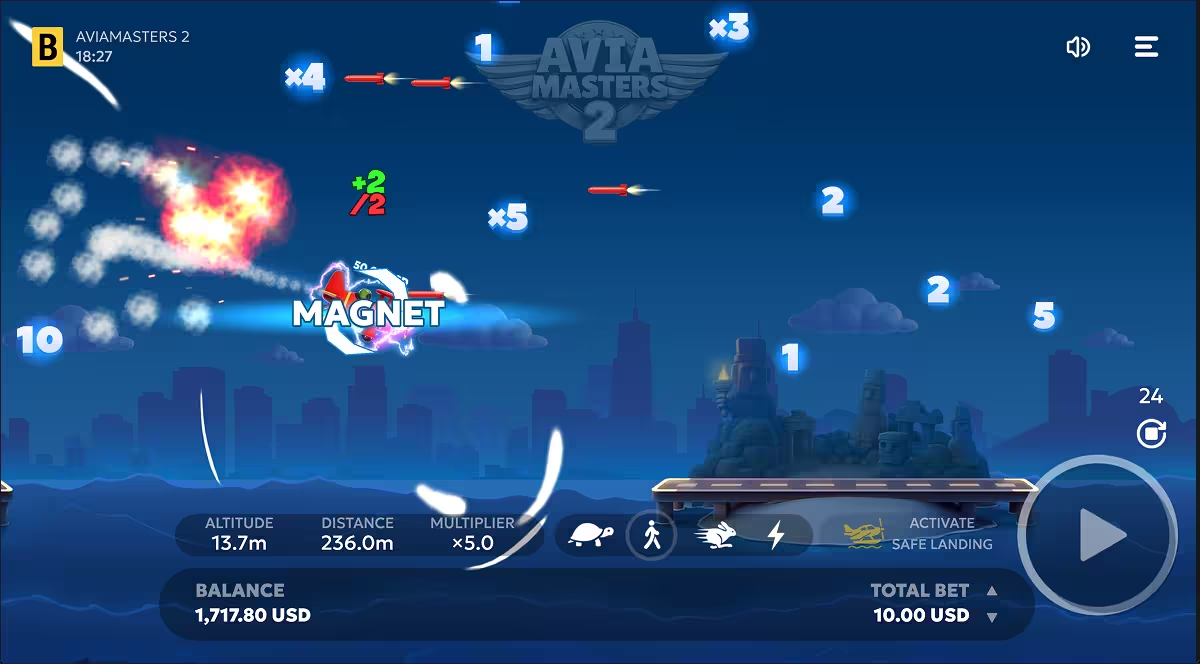
- Magnet
- – Drags nearby symbols toward the plane, sharply increasing how many additive and multiplying pickups you actually collect rather than fly past. In a tight moment it can also magnetise the aircraft itself toward the island and turn a certain crash into a landing.
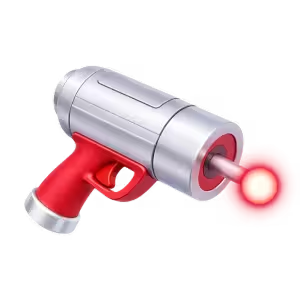
- Laser Gun
- – Fires ahead and destroys incoming rockets before they reach you, keeping the Counter Balance intact and the trajectory level. The one you most want to see when a run has already built into something worth protecting.


Because boosters appear at random you cannot build a strategy around having one. What you can do is recognise them instantly and understand which situation each one rescues — that alone is the difference between using a Magnet to farm multipliers and wasting it thirty metres from a landing you were always going to make.
Step 6. Land Safely Or Crash
Every flight resolves one of two ways. Touch down on an island and the round is a win — your final Counter Balance is applied to your stake and credited to your balance. Go into the water and the round is lost, and it does not matter how high the Counter Balance climbed on the way there. That number only becomes real at the moment of landing.
The exceptions are the two protections already covered: a held Life Buoy will bounce you back out of the water once, and Safe Landing removes the possibility of a water landing altogether.

Safe Landing Mode Explained
Safe Landing is Avia Masters 2's built-in insurance policy. Switch it on before a round and the plane is guaranteed to reach solid ground — rockets, a punishing trajectory or a stretch of open water between you and the nearest island make no difference. To activate it, tap “Activate Bonus” to the right of the progress dashboard and confirm in the pop-up.
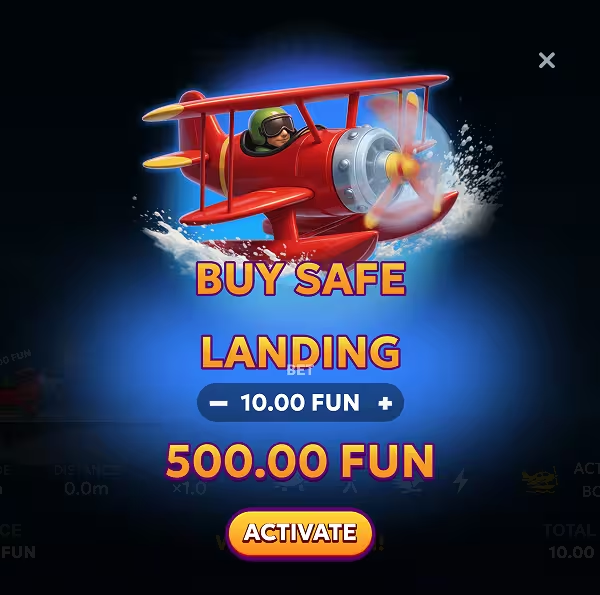
It costs ×50 your base stake for each round it is active. A €1 bet makes the round €50; a €10 bet makes it €500. That is a steep premium, and it is worth being clear about what you are buying: Safe Landing does not raise your multipliers and does not alter the flight path. It removes the crash, nothing else. Your payout is still decided entirely by what the plane collects on the way in, which means a Safe Landing round can still finish below what you paid for it.
Used well, it has three obvious homes. Testing a larger stake for the first time without absorbing a full loss while you find your range. Locking in a round that has already gone well and where a crash would be genuinely painful. And as a deliberate low-variance style — running Safe Landing consistently and grinding smaller, more predictable results is a legitimate way to play this game rather than a beginner's crutch.
Adjustable Speed And The Spin Button
Four flight speeds are available and you can switch between them mid-round; the game opens on speed 2. Drop to speed 1 while you are still learning where symbols cluster and how boosters behave — being able to actually watch a Magnet work is worth more than a faster session. Push to speed 4 once the reading is automatic.
The Spin button itself is fully customisable from Settings. Move it anywhere on the screen, change its size and adjust its opacity. On mobile this matters more than it sounds: parking the button under your natural thumb position makes one-handed play comfortable and stops the control obscuring the flight path.
Hands-Free With Auto Play
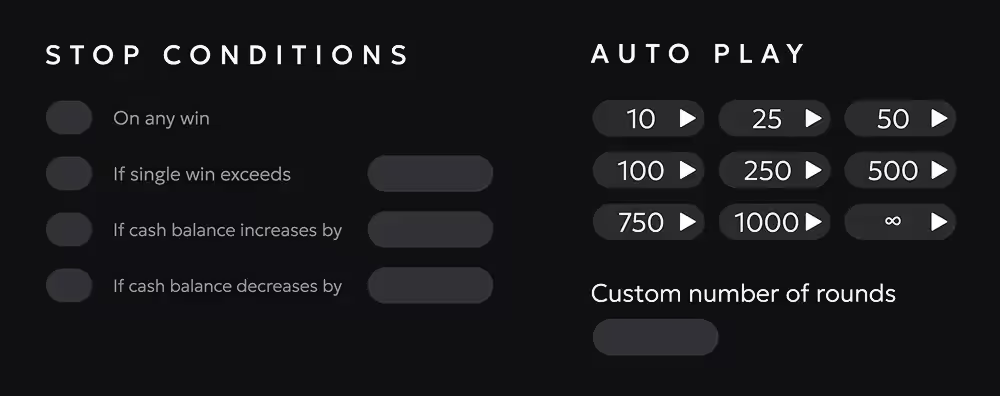
Auto Play runs a set number of rounds back to back without you touching anything. Set your stake first, then open the Auto Play menu beside the bet controls. You can define how many rounds to run and set stop conditions that halt the sequence if your balance climbs or falls by an amount you choose — worth configuring properly rather than leaving it running open-ended.
Before You Fly For Real
Avia Masters 2 runs at a 97.0% RTP with Medium–Low volatility on provably fair architecture, which means the path, the symbol placement and the booster spawns for each round are all generated before you press Spin and can be verified afterwards. Good odds as these games go — but the house edge is still real and no amount of booster knowledge changes it. Practise in the demo first, decide on a budget before you deposit, and stop when you said you would.
Everything in this guide can be tested for free. The demo on this site runs the same engine, the same RNG and the same 97% RTP as the real-money version — the only difference is the currency. Fly it until the boosters are obvious, then decide.